Hey everyone! If you’re looking to install hardwood treads and risers on a staircase, this guide will walk you through the process with pro tips to ensure a squeak-free, professional finish.

Festool ETS EC/5 sander |  | |
Table saw |  | |
Festool HKC 55 track saw |  | |
Collins stair gauges |  | |
18-gauge brad nailer |  | |
Utility knife |  | |
Hammer/mallet |  | |
Drill/driver |  | |
PL Premium construction adhesive (best for squeak-free bonds) |  | |
GRK screws (3" for structural reinforcement, 2" for hidden tread attachment) |  | |
Sanding pads |  | |
Scrap plywood/cardboard (to protect treads during work) |  | |
Wooden wedges/shims (for gap filling if needed) |
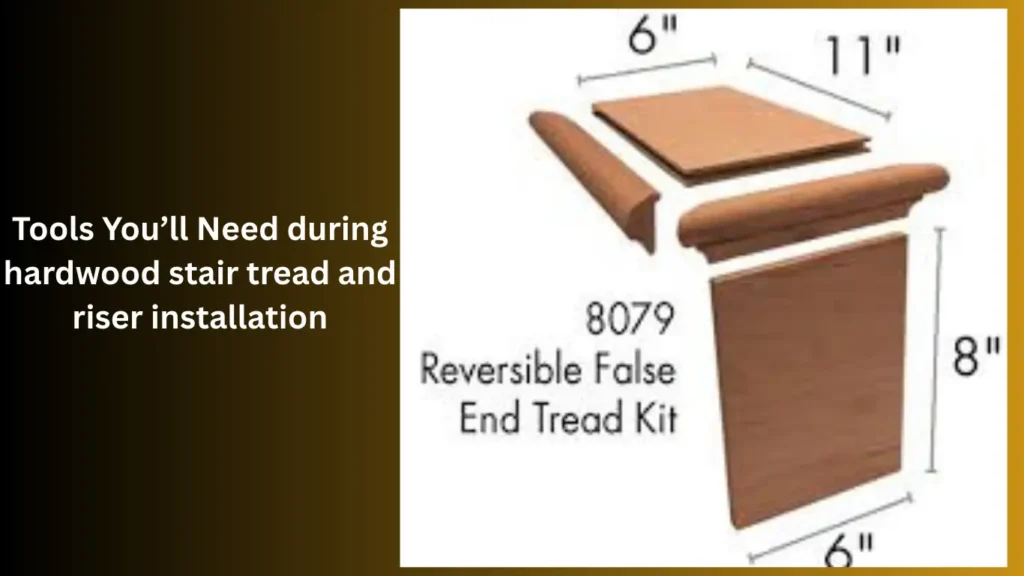
Tools You’ll Need during hardwood stair tread and riser installation
- Festool ETS EC/5 sander (or equivalent) – A must for smooth surfaces
- Table saw – For precise bevel cuts
- Festool HKC 55 track saw – Perfect for accurate rip cuts
- Collins stair gauges – Inexpensive but incredibly useful
- PL Premium adhesive – The best for a strong, squeak-free bond
- 18-gauge nail gun (2″ nails) – Minimal nailing for a clean look
- GRK screws (3″ and 2″) – For hidden reinforcement
- Utility knife – For sharp, precise marking
- Hammer/mallet – For adjustments
Step 1: Sand Everything First
Before installation, sand all treads and risers using a hard-pad sander (like the Festool ETS EC/5). This ensures a smooth surface for staining or painting.
Step 2: Bevel & Rip Treads
- Set your table saw to a 5-degree bevel and rip the backside of each tread.
- The width should be the stair run + 1.25″ overhang (adjust as needed).
Why the bevel? It creates space for adhesive and ensures a tight fit against the riser.
Step 3: Batch Cut Treads & Risers
- Pre-cut treads and risers slightly long and stage them near the stairs for efficiency.
- Use Collins stair gauges + Festool HKC 55 for perfect custom cuts never assume square cuts will fit!
Pro Tip: A trash can makes a great makeshift sawhorse for cutting on-site.
Step 4: Install Risers (Key to No Squeaks!)
- Apply PL Premium adhesive along the skirt board where the riser sits.
- Insert the riser with the 5-degree bevel facing outward for a tight fit.
- Secure the top with 18-gauge nails (just to hold height).
- Screw from behind (riser into tread) to avoid visible fasteners.
- Use 3″ GRK screws through the stringer into the skirt board to lock everything tight.
Why so much adhesive? It prevents movement and squeaks especially important since treads will be stained (no filler for nail holes).
Step 5: Install Treads (The Right Way)
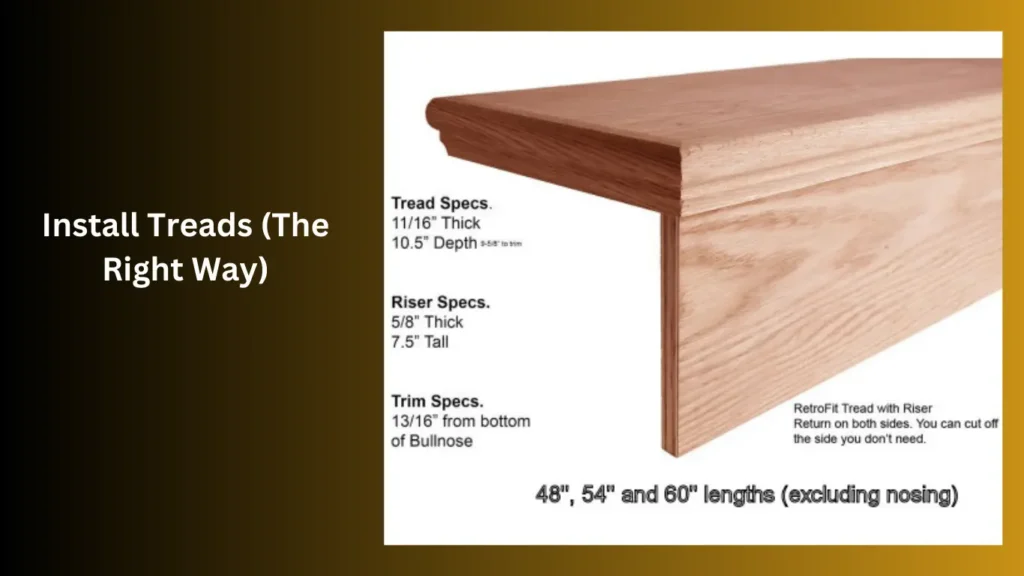
- Apply adhesive along the riser’s top edge and skirt board contact points.
- Slide the tread in, leaving a small gap at the back, then press flush.
- Push firmly to spread adhesive evenly.
- Check for gaps under the nosing if needed, add screws from behind (never face-nail!).
Pro Tip: If a tread is warped, a few hidden nails may be needed, but minimize them for a cleaner finish.
Bonus Tips for a Flawless Finish
Use wooden wedges – If you over-cut and leave a gap, glue in a small wedge, sand smooth, and paint over it.
Work in sections Install 4-5 stairs at a time for efficiency.
Protect treads Lay down scrap plywood while working to avoid scratches.
Double-check saw angles Risers = 5° bevel / Treads = 0° (forgetting this can ruin a tread!).
Final Thoughts
A well-built hardwood staircase should be solid, silent, and look seamless. By using precise cuts, strong adhesive, and hidden fasteners, you’ll get professional results every time. A wood stair tread and riser kit can make your stairs look updated and beautiful.
I hope you understand this article, if you want to install vinyl stair treads that is also available in my website.
Thank you so must for your time.